

In 2011, working in an industry where he had access to 3M automotive grade protection film Lee Regan, the founder and owner of invisiFRAME painstakingly cut out his first frame protection kit to protect his own pride and joy!
Fast forward 10 years and InvisiFRAME has become to the bike wrapping industry what Hoover is to the vacuum cleaner and now produce the non-yellowing, self-healing, millimetre perfect kits in more that 40,000 patterns for shipping all over the world.
Before we go any further there are 2 areas that should be addressed:
- I’ve never seen a need to wrap a bike. A bike is a tool, it’s going to get scratched and as such why bother? I’ve been called out on this already and, yes, I admit, I had a change of heart when my beautiful orange Bird Aeris AM160 arrived.
- InvisiFRAME don’t do a kit for the Aeris AM160 but After a bit of back and forth with Lee and the lads at bird everyone agreed that the AM145 kit should fit with a little trim – challenge accepted!
First impressions
In your choice of matt or gloss the kit comes rolled in a big poster tube so it is well protected and not going to suffer from any creases or postie-based abuse. In the tube you get the vinyl sticker kit on a large A3 sheet, an instruction page and ‘map’ of which section goes where and the all-important squeegee for applying the kit.
Unpacking is a little daunting, particularly if you’ve ever tried to fit one of those plastic covers on a mobile phone. However, the quality is immediately noticeable. The material feels thick yet super flexible, the corners are all rounded off nicely where they need to be and it’s so clear it’s difficult to see which bit is which on the white backing sheet – a big plus if you want an invisible kit!
Fitting
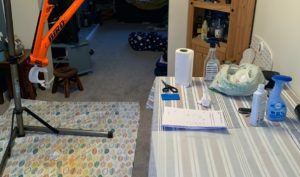
I managed to hold off building the new bike to ensure a blank, clean canvas for the frame wrap. I set up an indoor workstation to ensure it was warm and dry and got my bottles ready:
- Degreaser (Auto Glym tar remover as recommended by invisiFRAME)
- Water and Baby shampoo mix (LIDL in this case)
- Water and isopropyl alcohol mix (pro tip from Lee)
With the frame in the work stand I got to work matching the parts from the map, to the viny section, to the frame. Cleaned the frame with the degreaser, soaked the vinyl and frame with the water/baby shampoo and floated the pieces in place. Bing able to move the bike to all angles in the stand was a real help here.
Initially I found the pieces to be adhering to the frame too quickly but a little more shampoo in the mix helped this allowing me to move the pieces. Once in place A squirt of the isopropyl mix helps clear the soapy water out from under the sheets and helps them adhere a bit quicker and firmer. I used this on some of the pieces but as a first-time fitter found it easier just to use the shampoo mix.
Once you have the sheets in the desired place working from the middle you squeegee the water out and you’re onto the next bit. Shop towel of kitchen roll is useful for dabbing water but watch you don’t lift any edges before they are set.
While the pieces are millimetre perfect, as advertised I did have a couple of very minor bubbles in some of the bigger sheets. After a tip from one of the UK MTB Chat community I used a very small pin to prick these and push the water out – problem solved!
With regard to the Aeris 145 kit on the 160 frame. I had to cut a little bit off the length of one of the seat stays and also adjust the drive side chain stay to accommodate the cable guides now being underneath rather than on top. A fairly simple task with sharp scissors and one that’s gone unnoticed so far.
All in it took me about 2 hours to complete the full wrap to a finish I’m very happy with.
On the trail
I have given the invisiFRAME kit a rough ride in its first few months of life. It’s had straps round it, knees rubbed and crashes. Battered with rocks, washed, caked in mud and left for a few days. Last month in was even covered in dust for a brief period!
Through all of this it’s been almost untouchable and hasn’t shown any signs of discolouration or staining. I’ve had one huge rock strike which ripped the wrap and chipped my downtube badly, but I guess the damage could have been worse without the wrap and its more than pushing the limits of vinyl. As part of an experiment, I made a bit of a mess of the downtube section using a very old roof rack clap. If it hadn’t wrecked the invisiFrame it would have wrecked the paint so again, a win for frame wraps!
Luckily, InvisiFRAME will cut replacement sections on request which are priced dependent on the section size and amount of material required. These were also sent out next day delivery in a protective tube. I dreaded fitting the replacement parts, but the old ones came off easily with a bit of help from a hair dryer and after removing the cables and giving the frame a thorough clean they went on like new.
I found that my frame strap digs into the wrap and leaves a pattern mark from the webbing. True to advertised this ‘heals’ itself over a bit of time and can be accelerated with a little heat in its direction. This has been the same for cable, knee and shoe scuffs around the frame.

Final thoughts
This would probably be better titled, “have I been converted to frame wrapping?”
Yes I have and honestly, I don’t know why you wouldn’t!
Yes £74.99 can seem expensive but how much did you pay for that very shiny super bike? When you consider that there is a fair amount of material needed to cover a modern frame along with around 18 hours of design time for each template the price starts to look pretty good. Add to that the quality of the material and millimetre perfect cut and the service it actually provides, and I’d say every penny is about justified.
Even if you have no intention of selling the bike on at some point a frame wrap is going to keep your pride and joy looking fresher for longer. It also makes it easier to clean and maintain as the mud doesn’t stick as well to the wrap, a selling point on its own.
Fitting is relatively pain free if you take your time but if you don’t fancy the task, you can have a pro job for around £100 + the kit.
From now on, any addition to my fleet will include a trip to: www.invisiframe.co.uk


